
This Honda CB750 K Bobber is by our new pal Sean Henry from Kentucky. He’s been riding for 7 years, having started on a Honda CM450 in desperate need of brakes and an overhaul. Sean’s an eternal learner. He’s just finished his third college education in 15 years, and had choice words for the government, bankers, and corporations. Sean put his knack for learning to good use with this build.
Time for questions and pictures!
bM: So, they tell me you’re kinda smert.
Sean: I learned a lot along the way building this 750, and of course I had my mechanic buddy Joe help me with lots of troubleshooting. All the little parts machining I did myself from what I learned in the gunsmithing program at Yavapai College, Prescott, Arizona years ago. But the welding I never learned and had to get help with that on the frame. Otherwise, many maintenance things I learned riding my ole 450 cross country.
bM: Sweet CB, what’d it look like when you got it?
Sean: I picked up this 1976 Honda cb750k in Shelbyville, KY back in the summer of 09. It had just over 16000 original miles on it, a hole in the gas tank and the only thing not stock was a 4 to 1 hooker exhaust. Otherwise it was mint.
bM: Nice. How long until you started ripping it apart?
Sean: It sat in a garage for a year, I rode it around stock for about a month and then drug it out to Albuquerque where it sat for about 15 months. Finally in January of 2012 I started tearing it apart and ordering parts, and of course did some horse trading with the local Southwest Cycles.
bM: How long did the whole thing take?
Sean: It took me a year and a half to research parts, build and go to school full time. There were three week periods where I would just walk past the bike, while torn apart in my living room, because I had an exam to study for. I still question my priorities sometimes. But after lots of head scratching and fine tuning my baby is now a screaming ***** on the road.
bM: Priorities be damned. What went into the build?
Replacement stock parts:
- Fork tubes. Because the original 76 fork tubes are always rusted to **** because they are only chromed up to the bottom tree.
- Front brake caliper, piston and seal. Including a .200” spacer to work with the Kawasaki break disc.
- Head light ears.
- 4 to 4 exhaust with baffles.
Parts from other models:
- 1981 Kawasaki kz550a 19” front, 18” rear wheels
- 1968 Triumph Bonneville gas tank.
- Briggs and Stratton lawn mower gas tank for the oil tank. Holds as much as a gallon.
- Pair of coils from a Ninja, so I could change out the wires when I need to.
Aftermarket and custom parts:
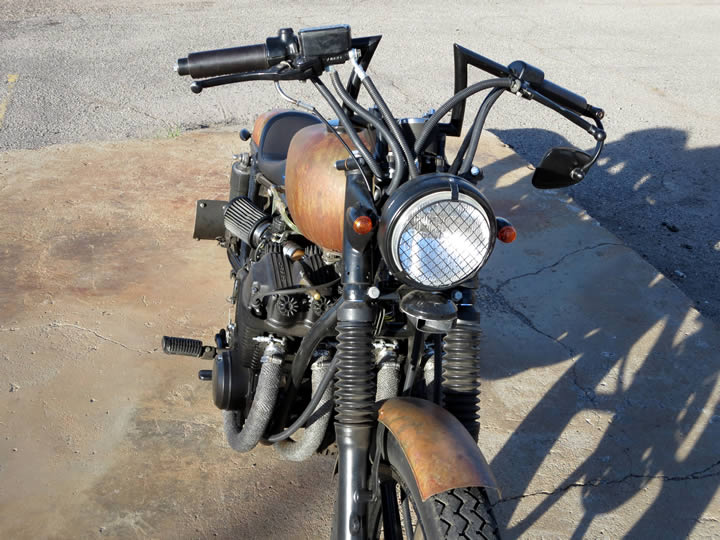
- Emgo headlight, turn signals, 11” short shocks and speedo with high beam, turn, oil and neutral lights inside.
- Ricks combo regulator/rectifier mounted where the horn used to be. The horn is now under the headlight.
- Biltwell keystone handlebars.
- Spectre Baja race car intake screen as a headlight grill.
- Bike yard find handlebar riser extensions and finned valve covers.
- Avon safety mileage tires. Yeah they’re cracked, but they’re tubed.
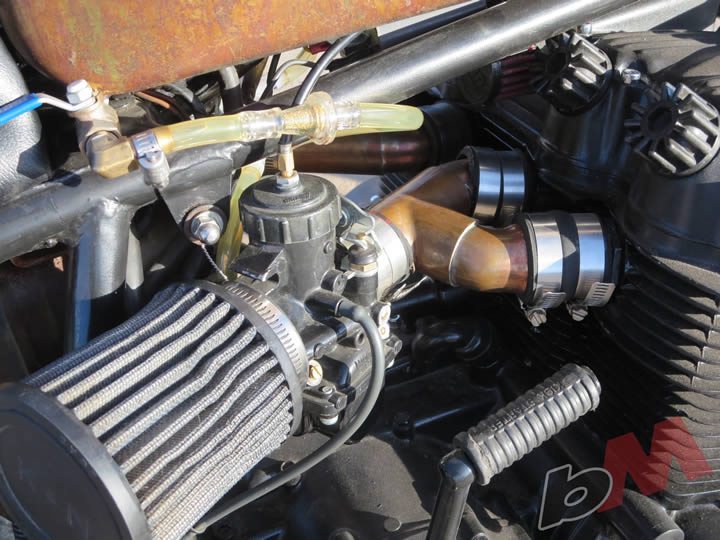
- K&N air filters soaked with lithium.
- 2 Mikuni VM32 carbs.
- U-haul trailer turn signal converter wired to the stock harness that allows brake, running and turn all from two double filament mini bullets.
Parts from the hardware store:
- Ball valves for petcocks.
- Battery box from a household electrical conduit knockout box. Holds a Shorai lithium battery.
- Smurf blue oil lines.
- **** tons of nuts, bolt and clamps.
Parts I made:
- 1.5” aluminum bar stock grips rapped with leather and sewn with sinew.
- Rear fender made from a mini peanut gas tank that was rusted out through the bottom.
- Brass tapered tac plug.
- 2 to 4 manifolds made from 1.25” copper water pipe. Yes they’re on a stock frame.
- .25” thick aluminum electrics plate to hold the battery, fuses, solenoid and winker relay.
- Used tire tube for shocks covers.
- Speedo and reg/rec plate.
bM: I didn’t notice any grey hairs in that list.
Sean: One of the most frustrating things with this build was the decision to go with a lithium FePO battery and the carb setup. One thing I want to stress is that these batteries are great compared to acid in that they don’t overcharge, blow a top and leak acid everywhere, but the aftermarket Emgo headlight, which I put on, comes with a 55/60 watt H4 halogen bulb that hogs all the power when starting and drains the battery in a heartbeat. The only remedy I found, and has worked great, is replacing the headlight bulb with one of Dime City Cycles 35 watt H4 bulbs. I plan to put a toggle kill switch in the headlight bucket.
bM: We put a headlight toggle switch on my old 2004 Suzuki Marauder VZ800, made all the difference. What else?
Sean: As for the carbs and manifolds, I changed the main jets from 200s to 180s and the pilots to 25s. I also had to change the main needles from the 6DP17s to the slimmer 6DP1. After caking the K&N filters with lithium grease my fuel/air mix and throttle response are pretty much right on.
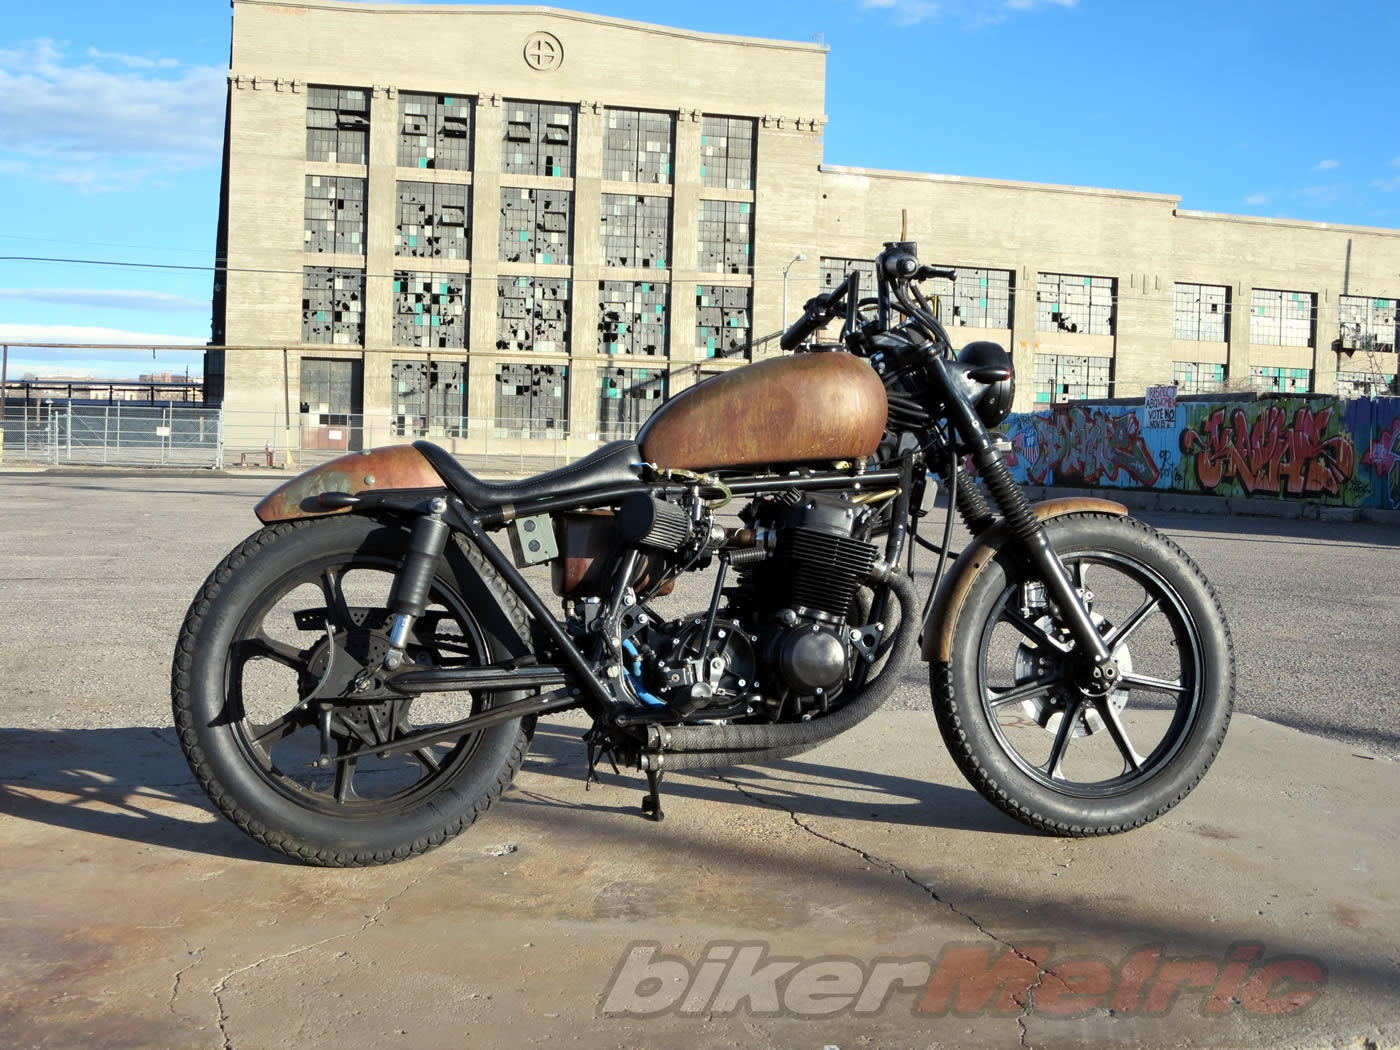
bM: Talk looks to me. That frame, the rust look, what are we looking at?
Sean: I had Velocity Cycles cut, bend and weld the frame to allow seat drop. Many parts had to be chrome stripped to accept paint and patina finishing.
After wasting money, time and fried nose hairs trying to work with sodium hydroxide and muriatic acid to get a decent rust effect on the fenders, gas tank and oil tank, I discovered white table vinegar. Mixing a little vinegar with some green vista acid from Townsend Atelier gave it the look I was after.
I perforated the front sprocket cover, rear brake shoes hub and chain guard. Retapped the Triumph luggage rack screw holes and plugged them with ¼-20 button head screws and red locktight. They won’t be coming out. This was to try to match the look of the 5/16-18 carriage bolts holding the back fender to the frame, which also holds the turn signal converter box.


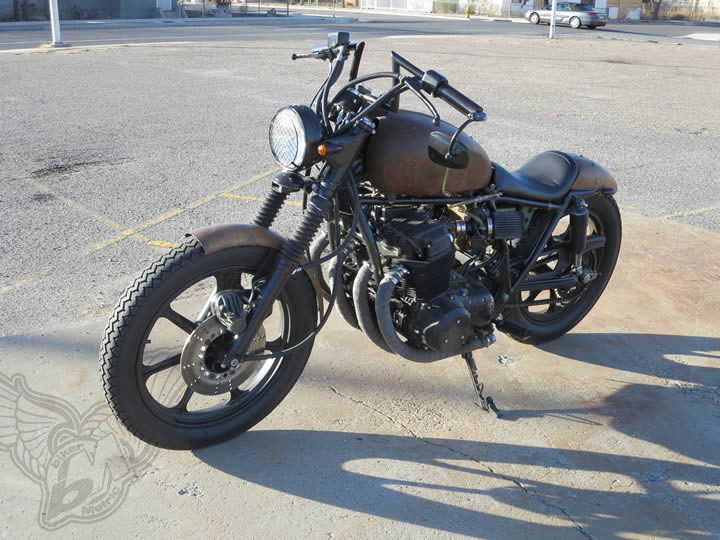
bM: It looks like it was friggen worth it!
Sean: This thing was a lot of work but it hauls *** and sounds great. After going through the trouble of having the frame cut, lowered and welded and lowering even further with short shocks and a smaller seat, some friends have asked me why I didn’t just go with an old Amen frame. My answer is: the stock wheel distance, lighter weight from stripping and extra horses from the carb set up makes this thing totally nuts on curves. It’s a lot of fun. It’s almost time to hack something else.
You said it Sean. Great first build brother!

Get the best of bikerMetric directly in your inbox, once a week, every week.
[wysija_form id="1"]